The Top 5-Step Process for Polishing Silver Jewelry Like a Pro
By Manus AI
Silver jewelry possesses a unique, bright white luster that has made it a favorite among artisans and wearers alike. However, achieving that signature brilliant finish requires a specific polishing process tailored to silver's unique properties. Silver is softer than gold and far more prone to scratching and oxidation (tarnishing), which means the journey from a raw casting to a mirror-like finish must be handled with care and precision.
In the jewelry workshop, polishing silver involves a meticulous progression of abrasives and compounds. Because silver tarnishes readily, the process must not only remove deep scratches but also seal the surface to maintain its pristine appearance. For silversmiths and bench jewelers, mastering the top five-step process for polishing silver is the key to creating professional, long-lasting pieces. Let us explore the definitive five-step process for bringing out the ultimate brilliance in your silver creations.
Step 1: Pre-Polishing Preparation and Pickling
The secret to a flawless silver polish lies in the preparation. After assembling, soldering, or casting a silver piece, the surface is often covered in flux residue, oxidation, and fire scale. The first critical step is a thorough cleaning and surface preparation.
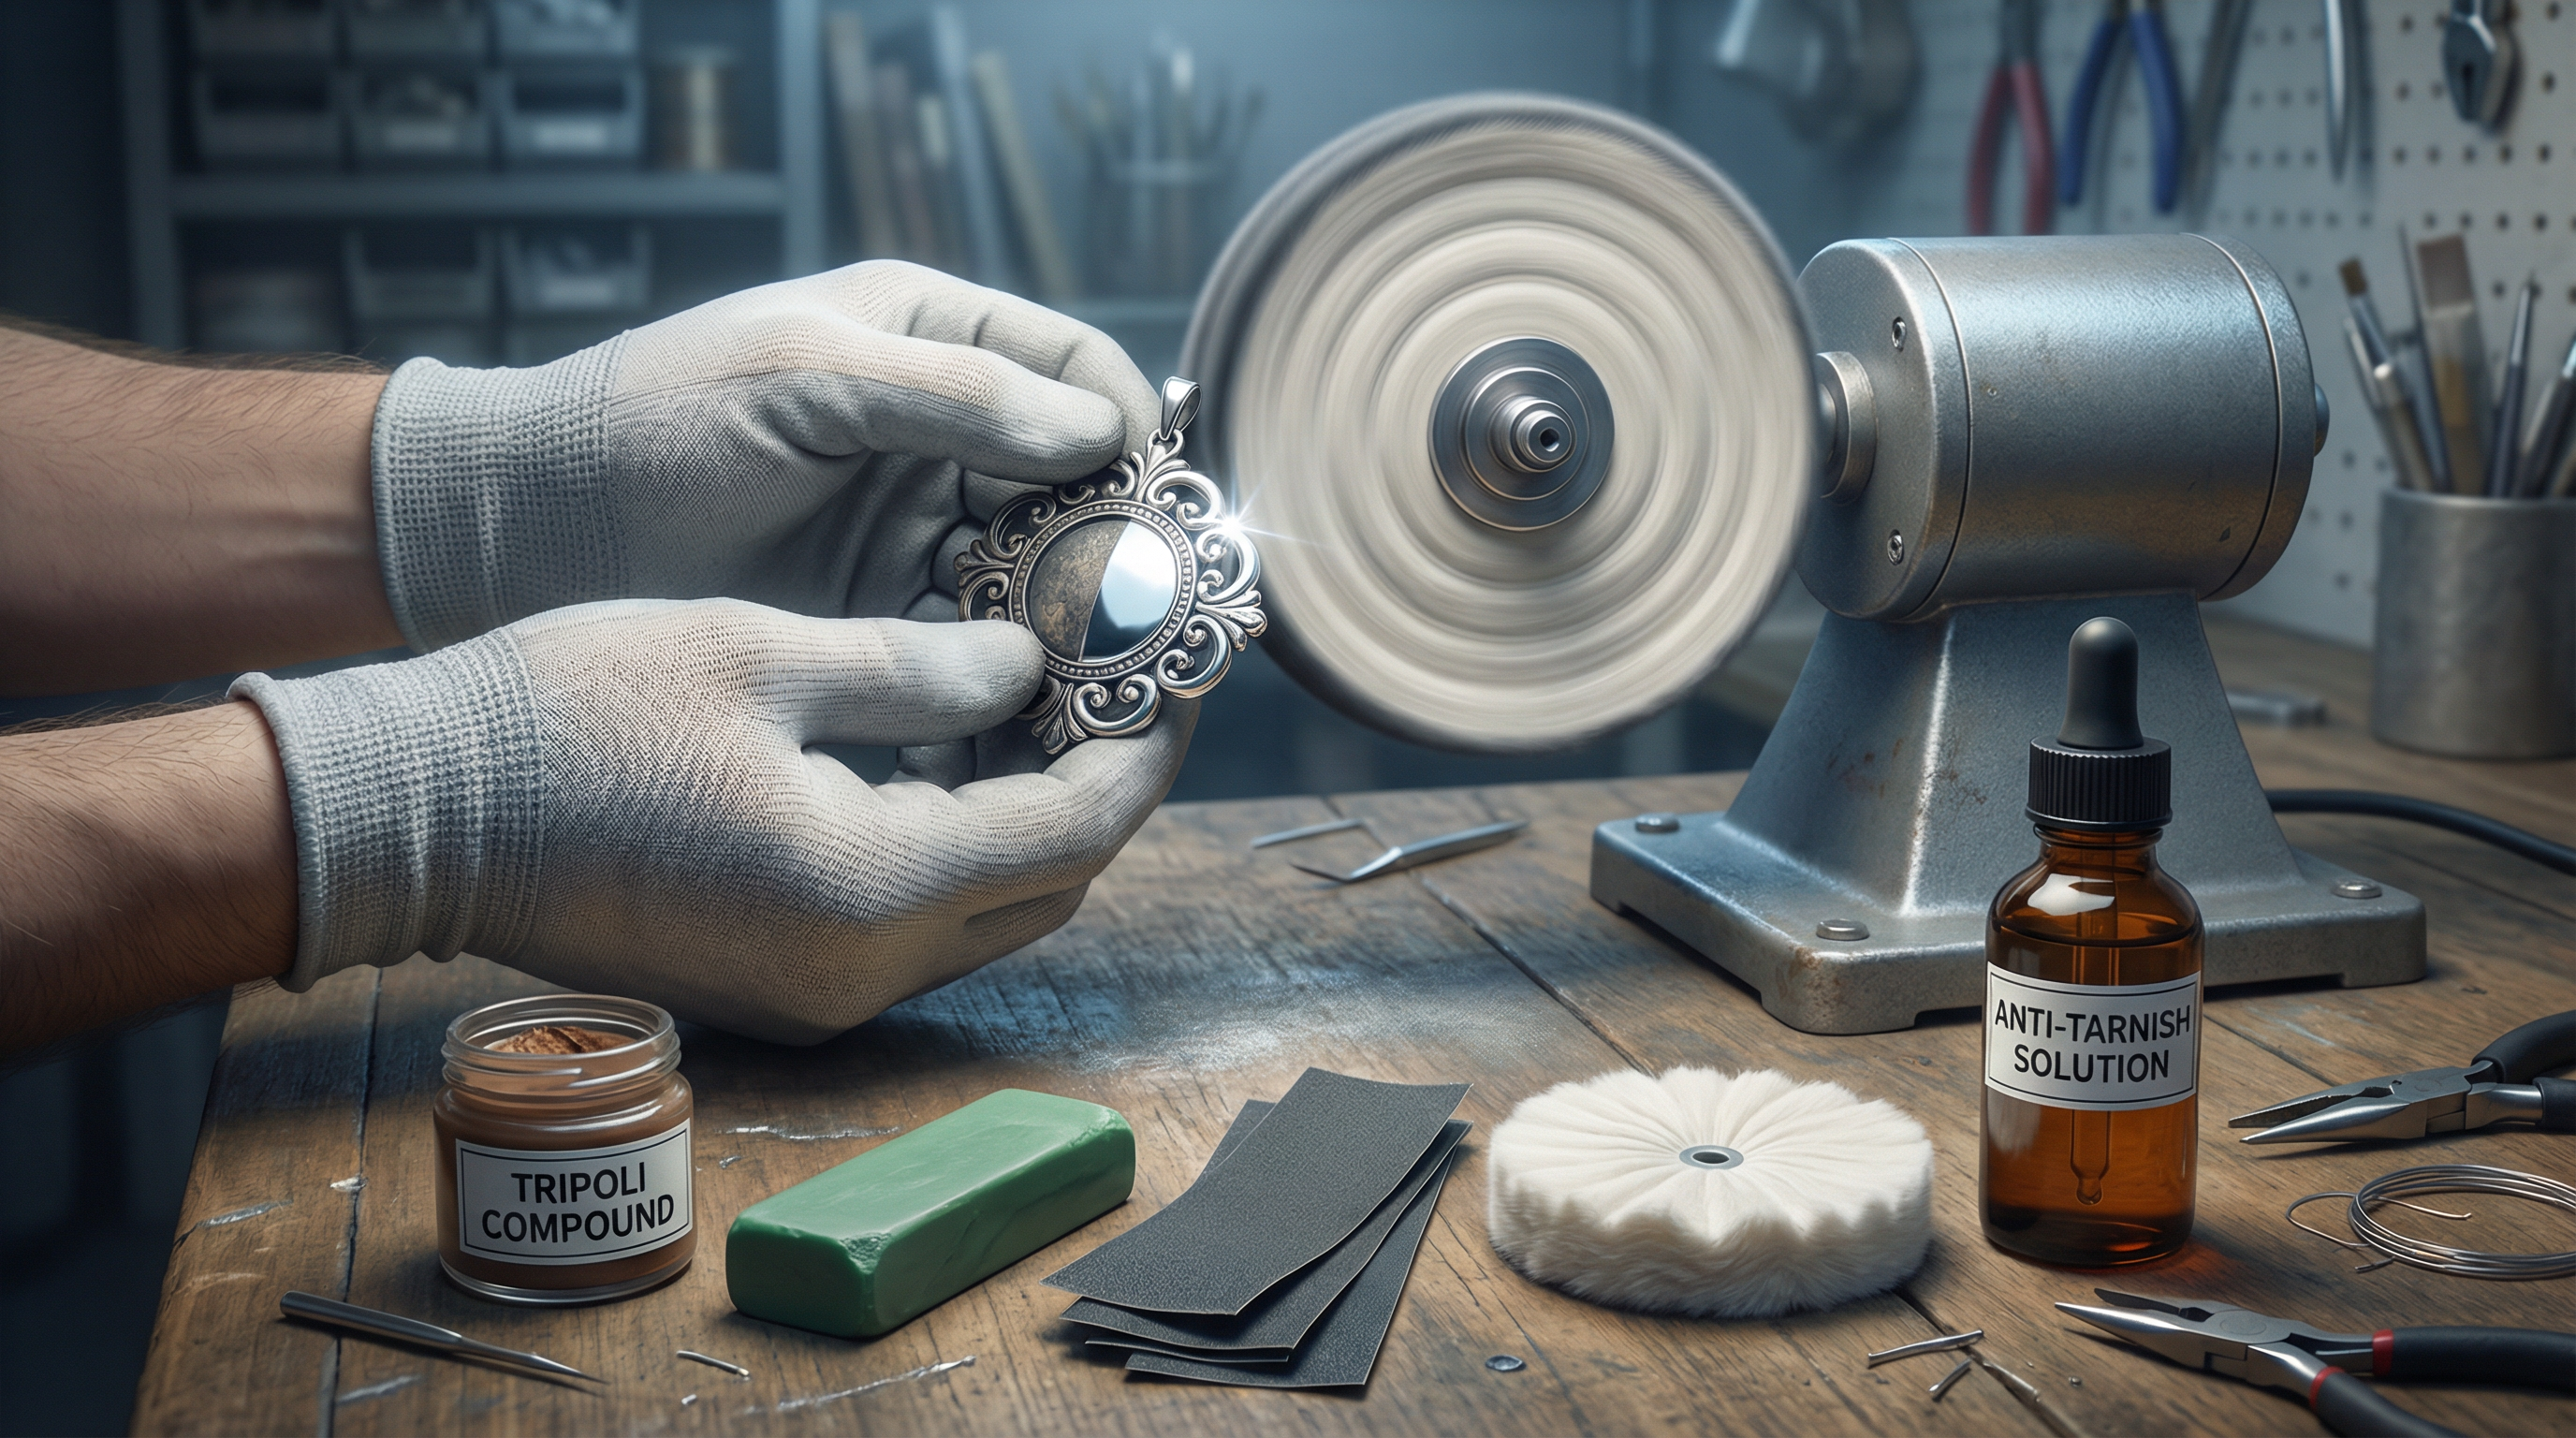
The silver jewelry must be submerged in a warm pickling solution to dissolve fire scale and lingering flux
. This chemical cleaning is vital; attempting to polish over fire scale will only embed it deeper into the soft silver. Once removed from the pickle, the piece should be rinsed in clean water and completely dried. Following the chemical cleaning, a physical inspection is necessary. Any rough edges, deep scratches, or uneven surfaces must be addressed using files or abrasive emery paper, typically progressing from 320 grit up to 600 or 800 grit
. Skipping this preparation phase will only magnify imperfections once the piece hits the high-speed polishing wheels.
Step 2: Aggressive Scratch Removal with Tripoli
Once the silver surface is uniform and free of deep gouges, it is time for the initial cutting phase. This step is designed to remove the fine scratches left behind by the emery paper and create a smooth, even foundation.
For silver, jewelers typically rely on a brown Tripoli compound applied to a treated, combed muslin buffing wheel
. Tripoli is an aggressive, abrasive compound that effectively cuts into the soft silver. When applying the piece to the spinning wheel, it is crucial to keep the jewelry moving continuously. Dwelling on one spot can quickly create flat spots or wear away delicate details. The goal here is not a high shine, but rather a uniform, satin-like finish devoid of any visible scratches.
Step 3: Intermediate Luster Development
With the scratches removed, the focus shifts to developing the metal's luster. This intermediate step bridges the gap between the aggressive cutting of Tripoli and the final mirror finish.
Before proceeding, the silver piece must be thoroughly cleaned—often in an ultrasonic cleaner—to remove every trace of the abrasive Tripoli compound
. Cross-contamination is the enemy of a good polish; even a microscopic speck of Tripoli on your next buffing wheel will introduce new scratches. For the intermediate stage, jewelers often use a medium-fine compound, such as white diamond or a specialized green rouge, applied to a softer, stitched white muslin buff
. This step begins to bring out the reflective qualities of the silver, replacing the satin finish with a bright, semi-reflective surface.
Step 4: The Final High Polish with Rouge
The fourth step is where the magic truly happens. This is the stage that transforms the silver from merely shiny to a breathtaking, mirror-like finish.
For this final polish, traditional red jeweler's rouge remains a popular choice for silver, though some jewelers prefer specialized white or green rouges for an even brighter white finish
. The rouge is applied to a very soft, unstitched (loose) muslin or flannel buffing wheel
. Because the loose buff conforms gently to the contours of the jewelry, it polishes without altering the shape of the piece. A light touch is all that is needed; the fine rouge gently burnishes the surface of the silver, creating a flawless, highly reflective finish that defines professional craftsmanship.
Step 5: Final Cleaning and Anti-Tarnish Protection
The polishing process is not complete when the wheel stops spinning. The silver piece will emerge from the final buffing covered in a dark, greasy residue from the rouge compound.
The final step is a meticulous cleaning to reveal the true polish. The jewelry is typically placed in a heated ultrasonic cleaner filled with a specialized jewelry cleaning solution to break down the waxy binders in the polishing compounds. After the ultrasonic bath, the piece is gently scrubbed with a soft bristle brush before being steam-cleaned to blast away any remaining residue. Because silver is highly prone to oxidation, the final crucial step is applying a protective anti-tarnish coating or storing the piece in tarnish-resistant packaging to preserve its brilliant finish
.
https://iamtransformation.com/tribe-landing/the-gold-standards?ref=55A53CA7
References
[1] Cookson Gold. "A Guide to Professional Polishing."
[2] Reddit r/jewelrymaking. "Proper steps for polishing?"
[3] Stuller. "3 Easy Steps to Achieving the Perfect Polish."
[4] Ganoksin Jewelry Making Community. "Basic Polishing Technique."
[5] Esslinger. "Guide to Buffing Compounds and Their Uses."

 The gold Standards